MarvelMute Round Rubber Sound Isolation Clip

MarvelMute Round Rubber Sound Isolation Clip
Resilient Sound Clip for soundproofing walls and ceilings Detailed view of a resilient sound clip Resilient sound clip on a hat channel Metal Furring channel with a Resilient Sound Isolation Clip Resilient Sound Clip for Soundproofing Resilient Sound Clip and channel installed on a wall Joist

A budget friendly High Quality Resilient Sound Isolation Clip.

Made from fire resistent material, this clips meets the industries highest standards and can add from 15 to 20 STC points to your walls and ceilings. Also greatly increases the IIC ratings for floors and helps mitigate footstep and other impact sound.

In stock and ready to ship within 1 business day! with an easy return policy.

Sold per pack. Bulk disounts on boxes of 200.

Price per clip (10 pack=$2.99, 50 pack=$2.95, 200 pack=$2.49)

See more details below.

Price: $29.90
Amount
Qty
Save to wishlist
Fast turnaround
SKU MMSCR1-10
Installation Guide

For a Visual Presentation, see our Video Tutorial Page Here

Click to Print Marvel Mute Sound Isolation Clip Installation Guide

Applying Whisper Clips

Applying Whisper Clips

See Diagram Above and to the left:

  1. Clips are spaced no further than 48 inches apart horizontally
  2. Hat channel must not be spaced more than 24 inches vertically
  3. Bottom clips must be less than 3 inches from the floor
  4. Top clips must be less than 6 inches from the ceiling

To distribute the weight of the drywall evenly, we recommend that you stagger the Clips on the studs or joists.

How Many Do I Need?

As a general rule, figure one MarvelMute Soundproofing Clip for every 5 square feet (20% of total square footage). However, since more clips are required for the ends of the walls / ceiling, we recommending purchasing at least 23% of total square footage (multiply the total square footage by .23)


STEP 1: APPLY MARVELMUTE CLIPS:


Resilient Sound Clip installed on a stud

Measure for placement of Marvel Mute Clips using layout guidelines listed above. Mark locations and install clips using appropriate screws, see below.

Note, Install ceiling drywall before walls to allow for a fire stop by butting ceiling drywall to studs, See diagram to the bottom left.

Outermost clips must be spaced at every interval.

Recommended Screws by Stud Type:

  • Wood: Use #8 x anywhere from 1 5/8” coarse thread screws
  • Steel: Use #8, 10 or 12 x 1-5/8” type S self-tapping screws
  • Concrete: Use 3/16” diameter x 2-1/4” Tapcon or equal anchor screw


STEP 2: APPLY HAT CHANNELS


putting a hat channel into a marvelmute sound clip

Cut the hat channel to length using a pair of metal cutting shears. Once cut, fasten the hat channel into the Noiseproofing Clip by inserting the bottom lip first and pulling down to snap the channel into place.

Recommended Hat Channel, See Bottom Left:

  • Size: 25 gauge hemmed edges
  • Depth: 7/8”
  • Width Top: 1 1/4”
  • Width Bottom: 2 1/2”

Overlapping Hat Channels:

Most walls will require you to overlap hat channel, instructions for doing so are as follows:

Overlap 6” of hat channel between two clips. Secure the hat channel with two 7/16” framing screws. 18 gauge tie-wire can also be used.

Compatible Hat Channel can be purchased by selecting link.


STEP 3: APPLY DRYWALL


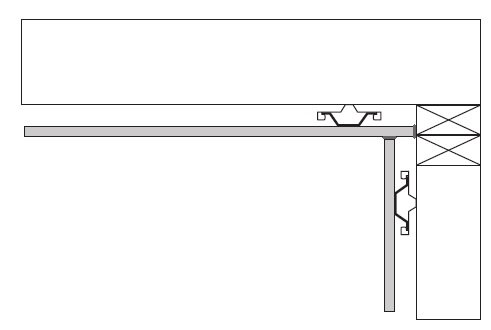
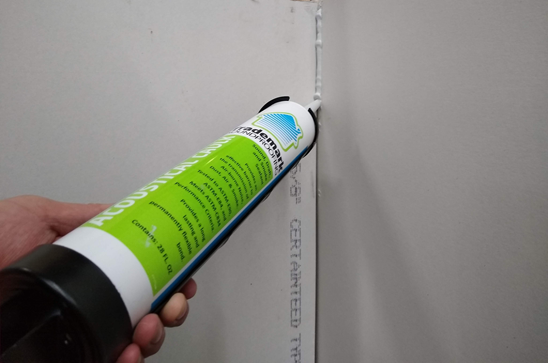
Place 1/4" shims on the floor to allow spacing between the drywall and the flooring. This ensures decoupling from the floor to make it impossible for vibrations to travel from wall to floor and vice-verse.

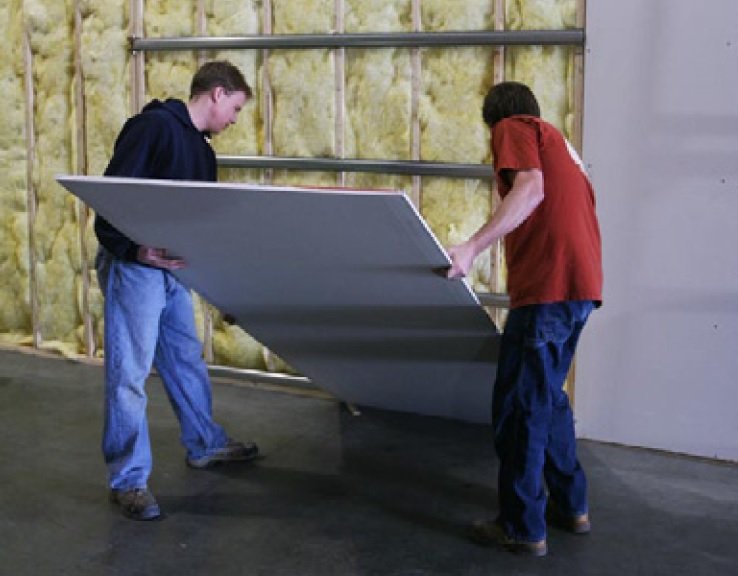
Screw drywall in place through hat channel. While hanging your first layer of drywall, space screws on the channel according to your local building code.

Recommended Screws: For the first layer of drywall, use 1-1/4" fine thread drywall screws with any additional layers being fastened with 1-5/8” coarse thread drywall screws. Be sure not to use longer screws as they could penetrate the stud and couple the drywall to the frame, thereby creating a short circuit and reducing the benefits of the Clips.

Be sure drywall is fully installed before removing shims from underneath.

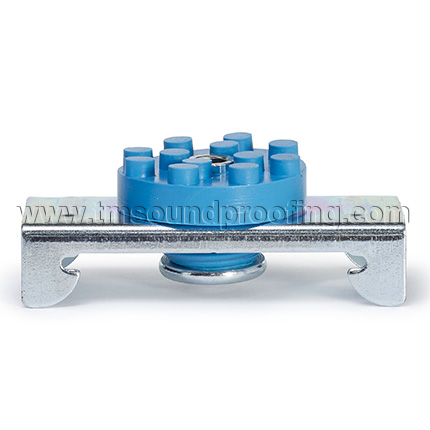
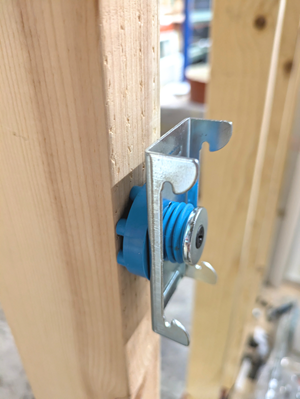
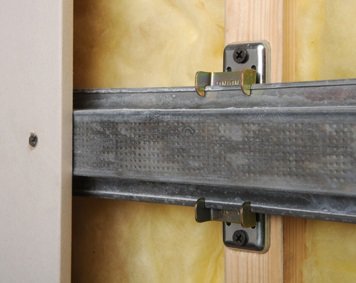
Load Specifications: 36 pounds per clip

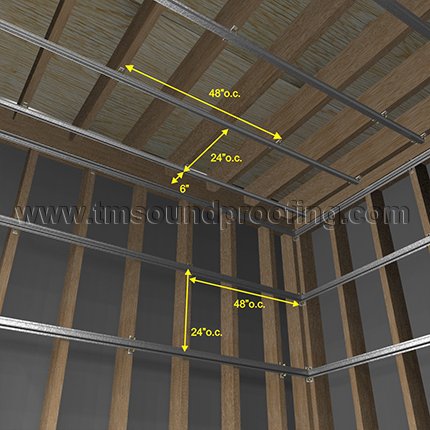
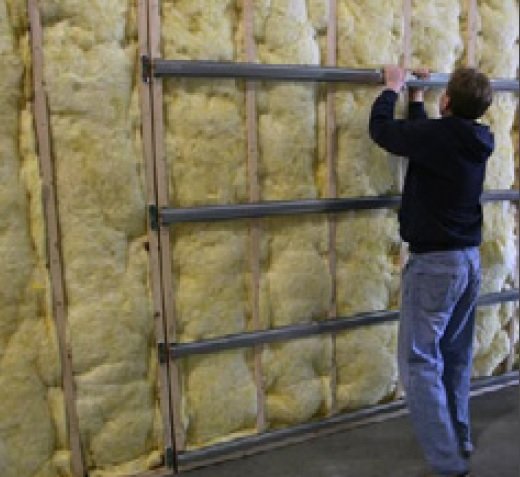
Standard Clip Spacing: 48 inches between Clips and 24 inches between hat channels.

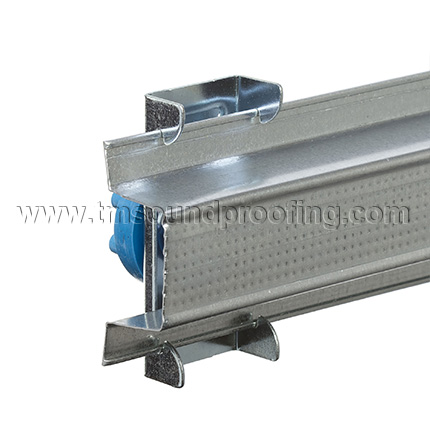
Clips are designed to carry hat channels with two layers of 5/8 inch drywall attached. Additional layers can be added with the clips and channels being spaced closer together.

When installed clip and channel will space the drywall 1-3/4" away from the stud.


STEP 4: APPLY ACOUSTICAL CAULK

 
Applying acoustical caulk to drywall

Be sure to use an acoustical sealant to fill gaps around electrical boxes, windows, doors, and areas below and above sheets of drywall.

TMSAcoustical Caulk is perfect for this application as it allows flexibility, while stopping sound from transmitting through unsealed areas.

Note, if applying a base board to the drywall, ensure that the base board is attached to the drywall only, and does not connect the wall to the floor, as this will create a short circuit thereby reducing the benefit of the clips.

 
Send to friend
: *
: *
: *
 
Reviews
Recently Viewed
Q&A