|
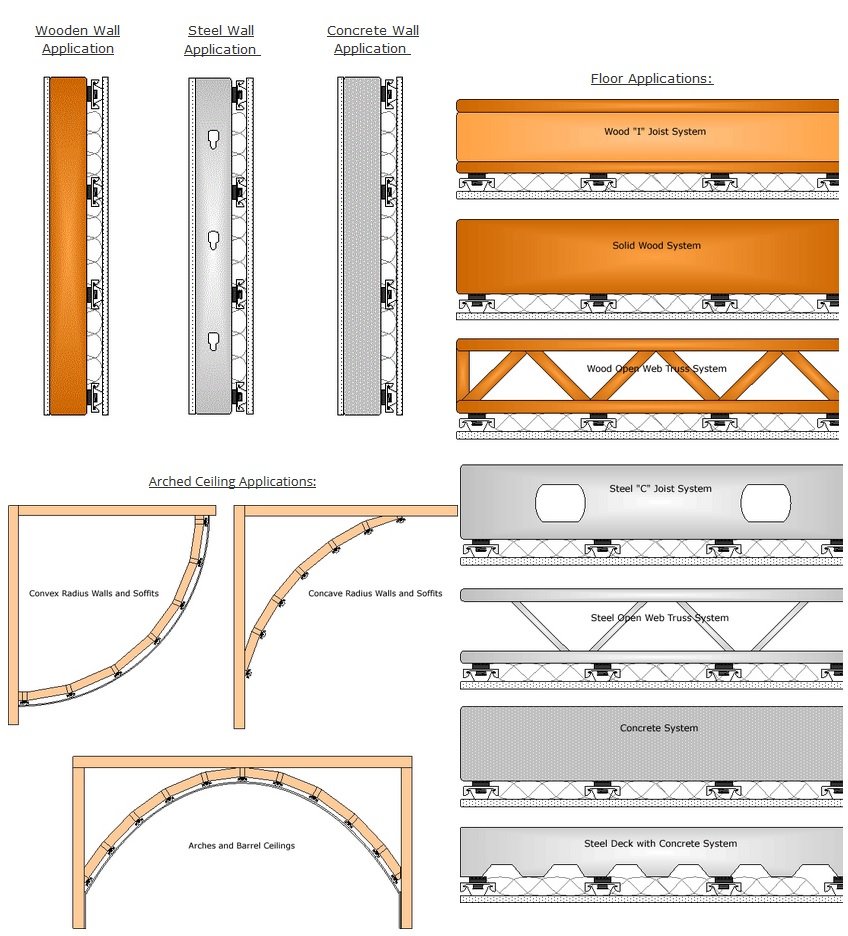
WALLS AND CEILINGS:
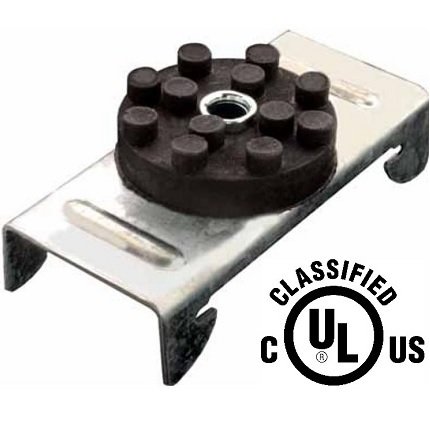
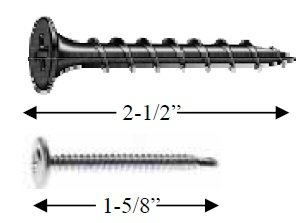
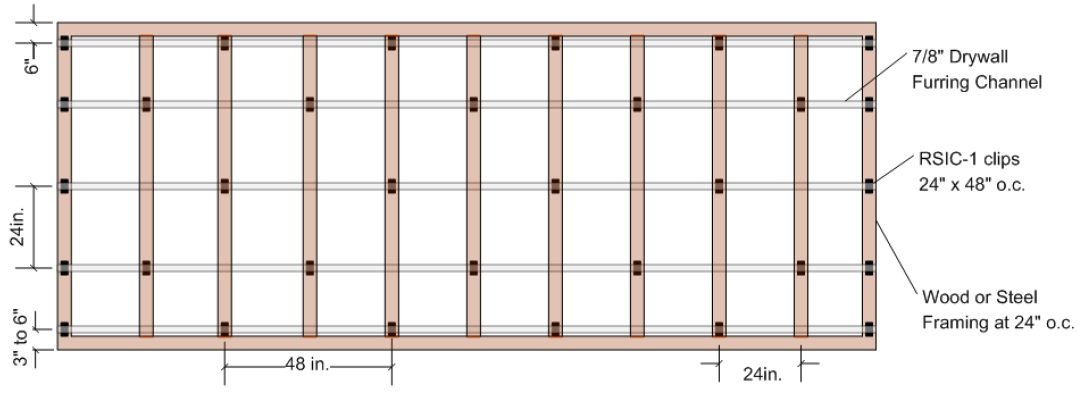
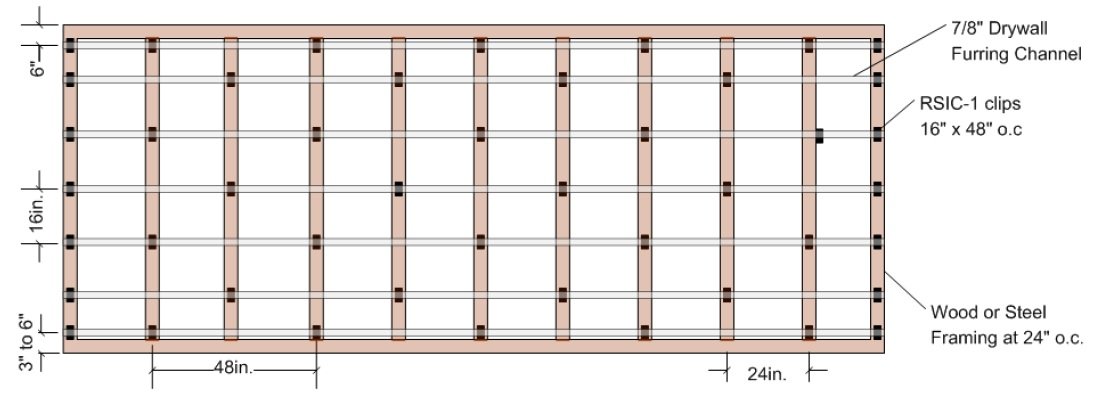
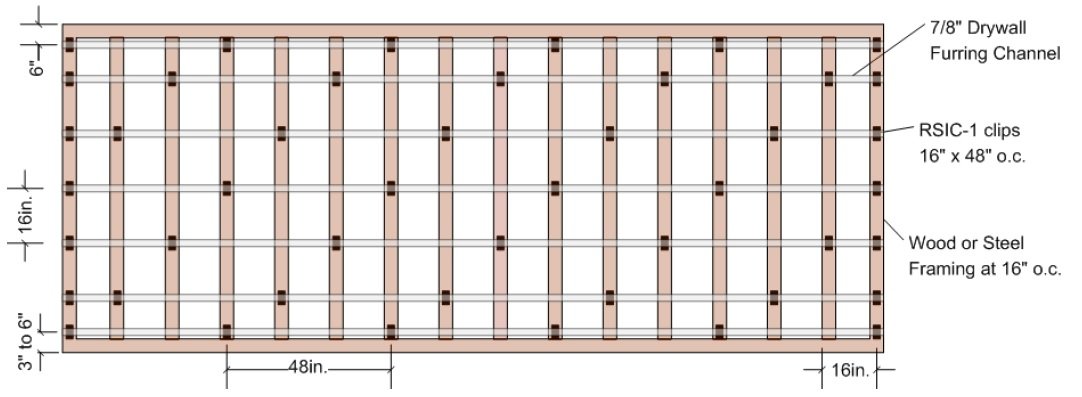
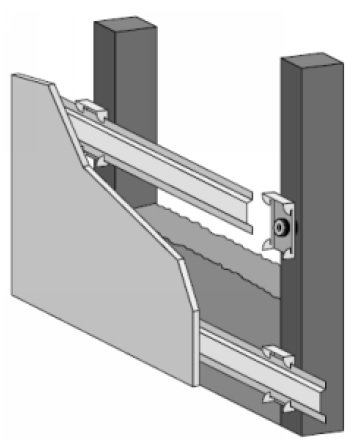
• Fasten RSIC-1 to the substrate with a fastener approved for a minimum pull-out and sheer of 120 lbs
(see above for details). Comply with Layout Details above.
• Ensure the internal metal ferrule is tight to the substrate.
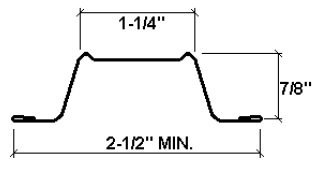
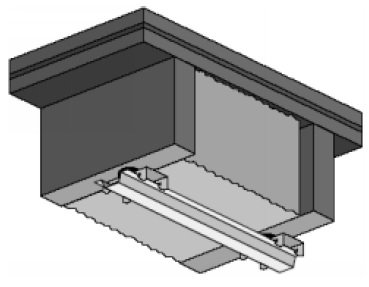
• Snap in the drywall furring channel (hat track) into the RSIC-1 clips (horizontal for walls).
• Place 1/4” (minimum) shim on floor to fully support the gypsum board.
• Install the gypsum board from the bottom up leaving a 1/4” min. gap around the perimeter of the wall.
• ONLY remove the shims after ALL the gypsum board is completely screwed to ALL the drywall furring channels.
Make sure every screw (floor to ceiling and wall to wall) is installed as required by the assembly design, in every layer of gypsum board before removing the shims at the floor. The shims are critical to ensure best results.
• Caulk around the entire perimeter of the gypsum board and seal all potential noise leaks, such as around electric boxes. Use fire and smoke rated Acoustical Sealant where required.
Important Notes:
• When attaching the RSIC-1 clips to a steel stud the minimum allowable thickness is 20 gauge. (0.030).
• Resilient Sound Isolation Clips, furring channel (hat track) and gypsum board shall not carry heavy loads such as cabinets or bookshelves.
|